

Connect to a network, make sure its Wi-Fi network adapter has access to internet.
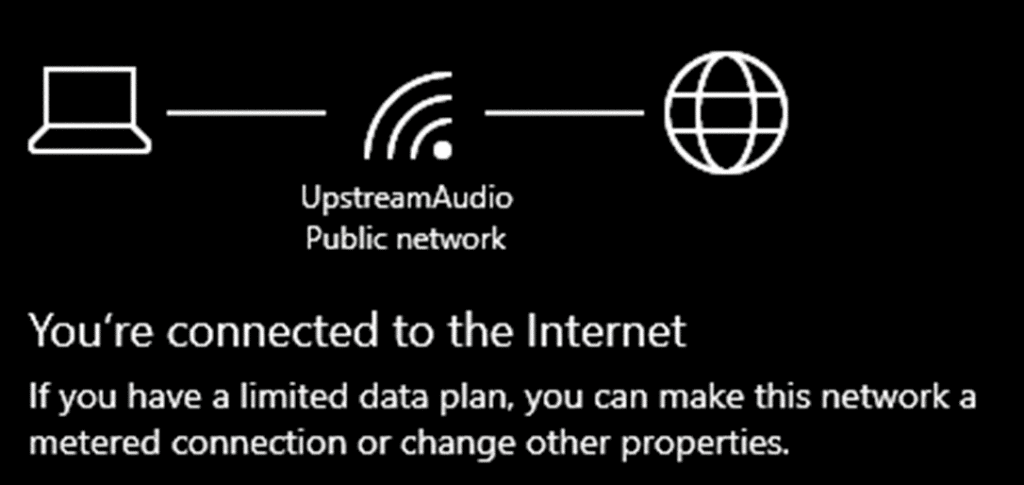
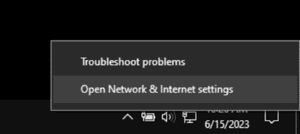
Go to Network and Internet Settings, and right-click on the Wi-Fi/Ethernet icon in the right side of the task bar. Then, click on “Open Network and Internet settings”.
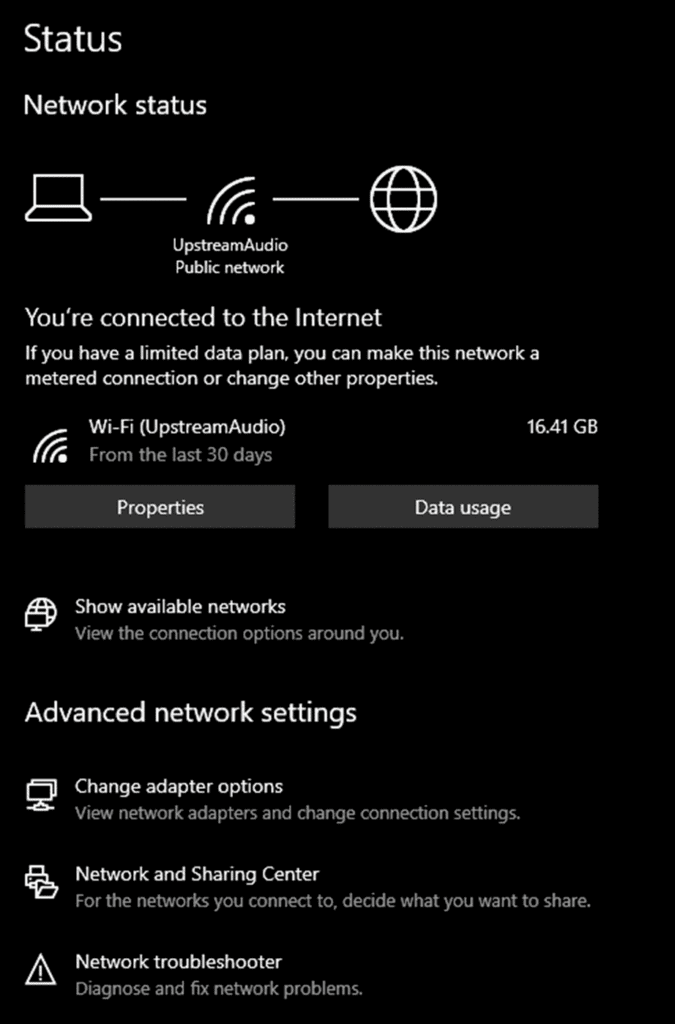
Select Change adapter options on the settings window.
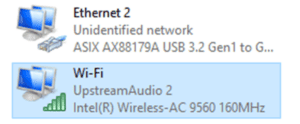
Make sure both Ethernet and Wi-Fi adapters are shown on the Network Connections window.
Right-click on the Wi-Fi adapter, select “Properties”, and then on the emergent window select Sharing tab.
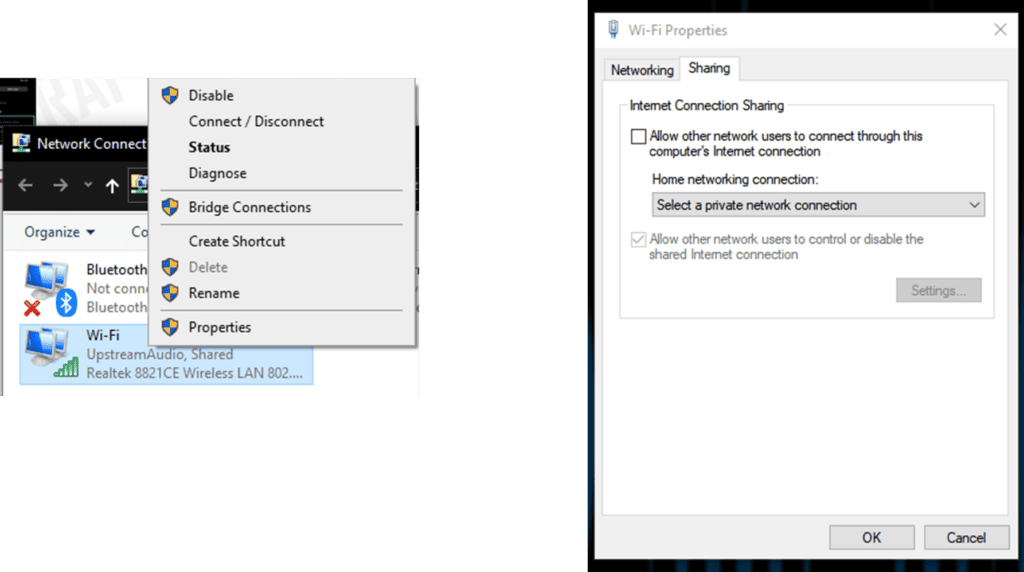
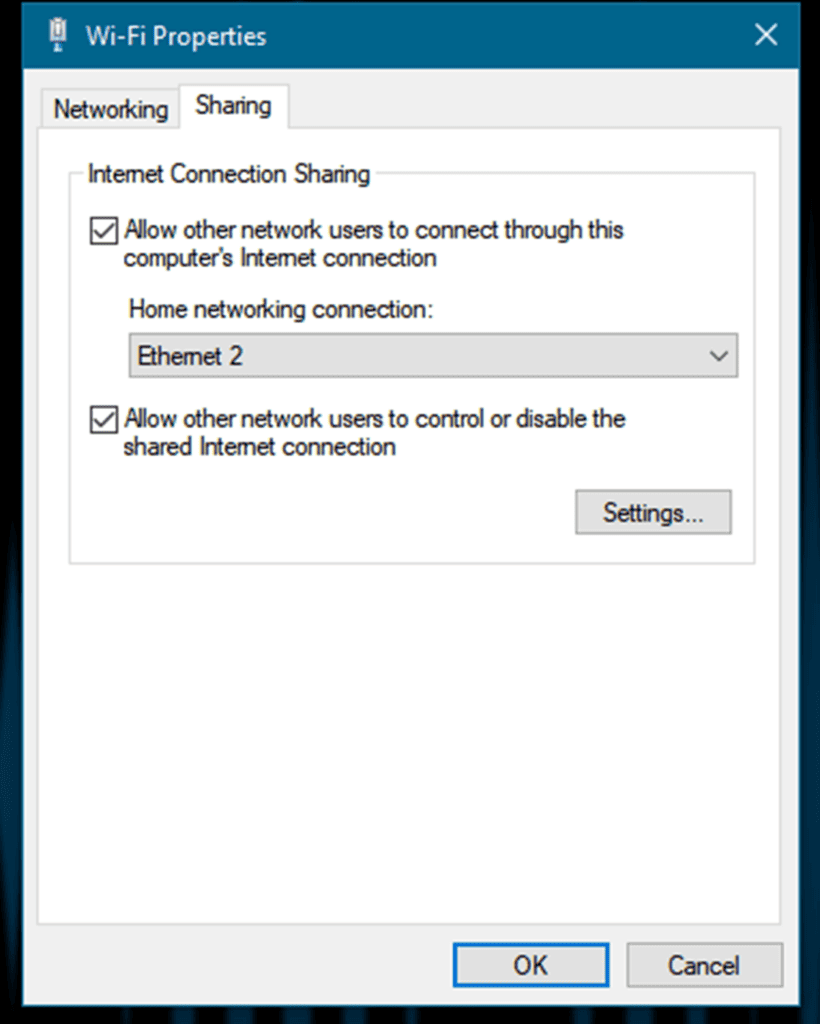
Check the “Allow other network users to connect through this computer’s Internet connection’” and select the network adapter to which the DPA-220 is connected, click “OK”, and then close the Wi-Fi properties window.
Open Dante Controller and go to “Device Info” Tab. (Note that it might take several minutes for the DPA-220 to be discovered by Dante Controller)
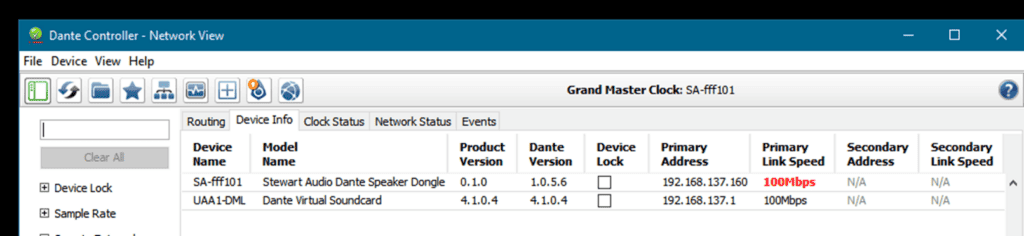
Now the device is ready to work on Stewart Audio Web Control Center. Refer to the followings pages for more details on setting the static IP address of the DPA-220.
Open a window on your preferred browser, go to the Search/URL tab, enter the target IP address shown in Dante Controller, and then press enter.
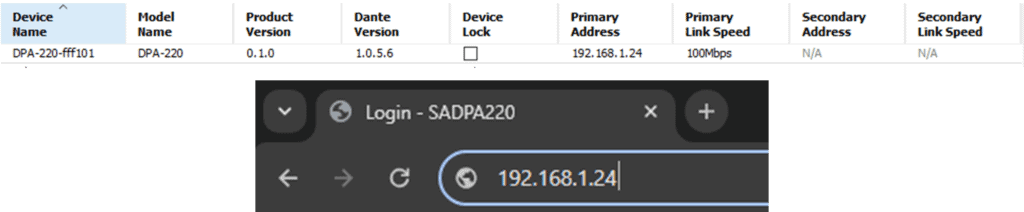
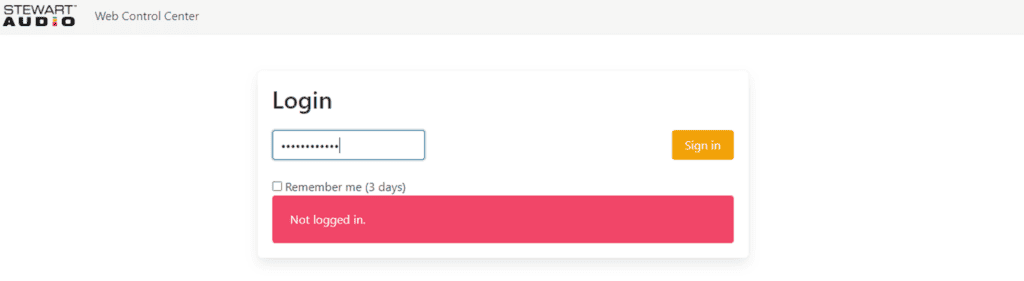
This will open the target device’s login interface, which will ask for a password. Type it in the password field on the Login screen, and press enter. (Note that the default password on the DPA-220 device is “stewartaudio”)
- After this, the target device’s Web Controller will be available. (Please see below for more details)
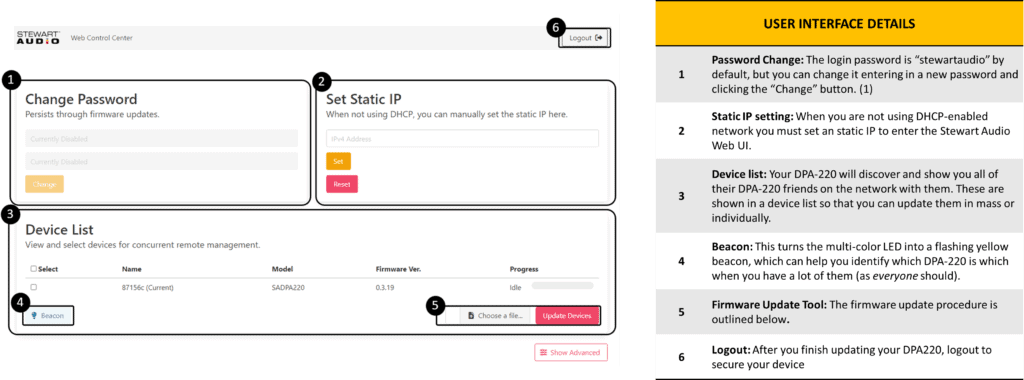
(1) The login password of your Dante Device will reset to the default after every firmware update. Make sure to re-secure your devices by changing the default password after every firmware update is installed!